 Save
Save I discovered the magic of pickled and fermented vegetables during a summer spent at my grandmother's cottage, watching her transform ordinary produce from the garden into jewel-toned preserves that lined her pantry shelves. Years later, when I finally asked for her secrets, she smiled and said it wasn't just technique—it was patience and the understanding that fermentation was nature's way of making vegetables tell a better story. Now, every time I arrange those tangy, colorful vegetables on a board, I'm transported back to that kitchen, and I feel like I'm passing along a tradition that tastes like memory.
I remember bringing a jar of these pickles to a dinner party, setting it on the table almost as an afterthought, and watching my friends return to it again and again between courses. One guest asked if I'd made them myself, and when I said yes, the look of surprise and delight on her face made me realize that something as simple as preserved vegetables could feel like a gift.
Ingredients
- Carrots, julienned: They soften just enough to become tender but stay crisp enough to give that satisfying bite. Always use firm, fresh carrots—the fresher they are, the better they pickle.
- Cucumber, sliced: Keep them cool before slicing; warm cucumbers absorb brine unevenly and turn mushy.
- Radishes, thinly sliced: These are your flavor wild card—peppery and crisp, they bring a beautiful bite that makes people ask what you used.
- Red cabbage, shredded: It's one of the most forgiving vegetables to pickle and creates those stunning jewel tones that make the platter irresistible.
- Cauliflower florets: Keep them small—they'll cook through faster and pickle more evenly.
- Green beans, trimmed: Blanch them for just 2 minutes before pickling so they stay emerald green and don't turn olive drab.
- White vinegar: Use the best quality you can find; it's the backbone of your brine and deserves that respect.
- Water: Filtered water works best if you have it—chlorine can cloud your jars.
- Sugar and kosher salt: Together they create the perfect balance that makes vegetables want to surrender their crispness while gaining incredible flavor.
- Garlic cloves, sliced: Fresh garlic mellows beautifully as it pickles, becoming almost sweet and buttery.
- Mustard seeds, coriander seeds, and peppercorns: These three are the seasoning trio that feels intentional every single time.
- Bay leaves: They're essential—they add an almost floral note that ties everything together.
- Fresh dill: This is non-negotiable. Fresh dill in the pickling jar is what separates homemade from ordinary.
- Red chili, sliced: A whisper of heat that builds as days pass; optional, but it transforms the entire experience for those who love it.
- Kimchi and sauerkraut: If using store-bought fermented vegetables, choose ones without fish sauce or excessive additives for the cleanest flavor.
Tired of Takeout? 🥡
Get 10 meals you can make faster than delivery arrives. Seriously.
One email. No spam. Unsubscribe anytime.
Instructions
- Prepare your vegetables with intention:
- Wash everything under cool running water and pat completely dry—water on the vegetables will dilute your brine. Slice and cut as indicated, keeping different vegetables separated on your cutting board. As you work, you'll start to appreciate the colors and how they complement each other. The reds, oranges, and greens naturally want to be together.
- Build your brine like you're making a potion:
- In a saucepan, combine vinegar, water, sugar, and salt. The moment you turn up the heat, you'll smell that sharp, clean vinegar scent rise through your kitchen. Watch as the sugar and salt dissolve completely into the liquid—this is the moment the magic begins. Once it's boiling, remove it from heat and let it cool just slightly. You want it warm enough to fill jars easily, but cool enough that you can hold your hand above it without wincing.
- Layer vegetables like you're building a piece of art:
- Take your clean glass jars and begin packing vegetables tightly, standing them upright so colors show through the glass. Group carrots together, then cucumber, then radishes. This isn't just for looks—tight packing means they'll pickle evenly and stay crisp. Leave just a bit of space at the top, about an inch or so.
- Season each jar deliberately:
- Divide garlic slices, mustard seeds, coriander seeds, peppercorns, bay leaves, dill sprigs, and chili among your jars. Tuck them around and between the vegetables so they're hidden like secrets that will reveal themselves as you eat.
- Pour the brine and witness transformation:
- Carefully pour the warm pickling brine over everything, ensuring vegetables are completely submerged. If anything floats, it will spoil, so use a clean weight or even a clean cabbage leaf tucked under the jar's rim to keep everything beneath the surface. The moment the hot brine touches the vegetables, they'll begin their metamorphosis.
- Let time do the heavy lifting:
- Seal your jars and set them on the counter to cool completely. This is where patience becomes an ingredient. After about 12 hours in the refrigerator, you'll have quick pickles that are bright and fresh. But if you can wait 48 hours, the flavors will deepen into something more sophisticated and complex.
- Embrace the fermented path, if you're brave:
- If you want to ferment vegetables traditionally, prepare them with a 2% salt brine—that's 20 grams of salt per liter of water. Pack vegetables in a clean jar, submerge them completely, and leave them at room temperature away from direct sunlight. Check daily for any mold (which you'll skim off) and taste as you go. In 5 to 7 days, you'll have vegetables that taste alive, fizzy, and deeply flavorful. The fermentation creates beneficial probiotics that quick pickling doesn't.
- Present your finished feast:
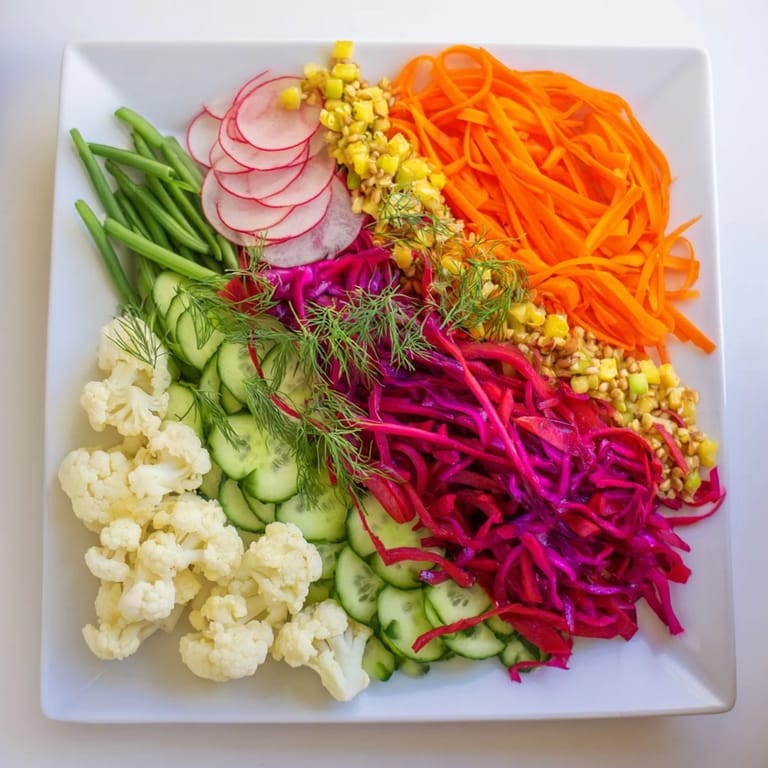
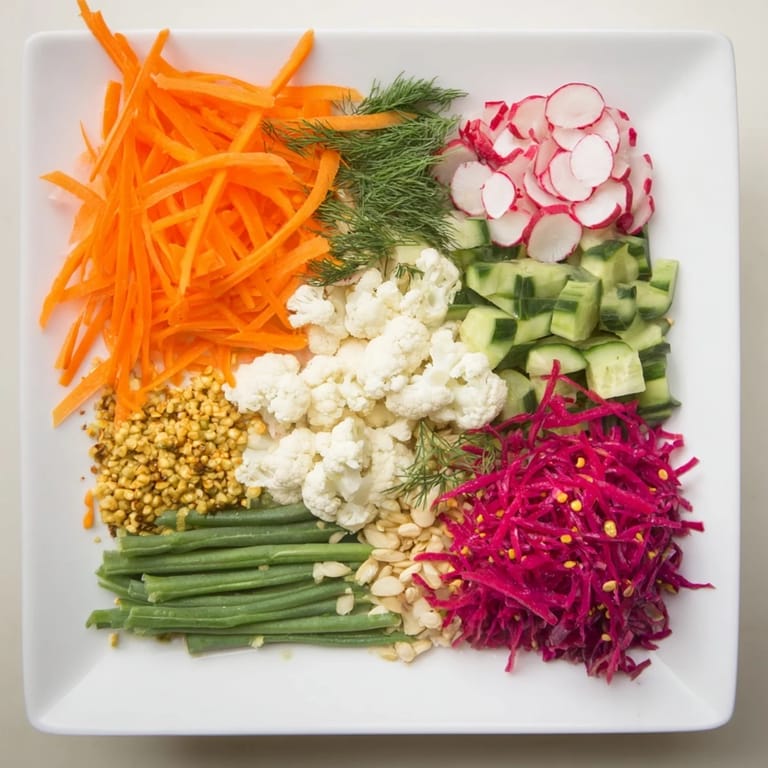
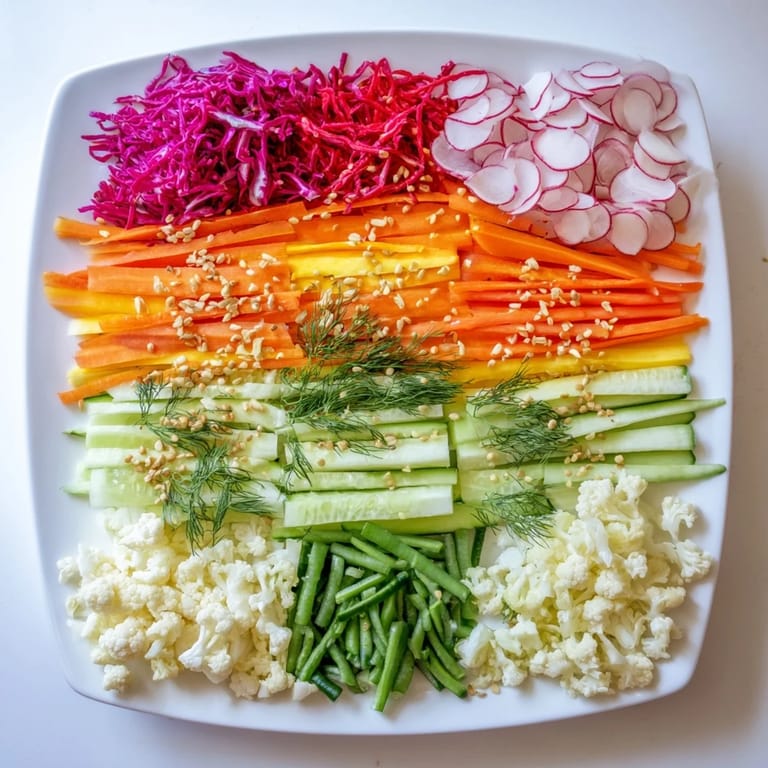
- When it's time to serve, arrange your pickled and fermented vegetables in small jars or bowls on a wooden board or platter. Set them in lines or a grid pattern—let the natural colors create the design. Step back and look at what you've made. It should look abundant and inviting, like you've brought color and life to the table.
 Save
Save One evening, a friend who had never tried fermented vegetables before grabbed a spoonful of homemade sauerkraut alongside the quick pickles, and I watched his face change as he tasted something he never expected to love. That's when I realized these pickles aren't just food—they're a small rebellion against the idea that vegetables are supposed to be simple and forgettable.
The Art of Color on a Board
The visual arrangement of your pickled vegetables is as important as their flavor. When you line them up in neat patterns or create a grid across a board, you're not just making food look pretty—you're telling a story about care and intention. I learned this from watching my grandmother, who understood that people eat with their eyes first. The reds and purples from pickled cabbage and radishes naturally draw the eye, so place them strategically. Lighter colors like blanched cauliflower and pale green beans create contrast. Arrange them so someone looking at your board wants to reach for every single color, which is exactly what you want.
Vinegars and Flavor Variations
White vinegar is your reliable foundation, but once you've mastered the basic recipe, rice vinegar and apple cider vinegar become your next adventures. Rice vinegar creates a softer, more delicate flavor that lets the vegetables sing. Apple cider vinegar brings a subtle sweetness and warmth that pairs beautifully with root vegetables like beets or turnips. Red wine vinegar turns your vegetables a deeper, more wine-like color. I discovered these variations by accident, experimenting with whatever vinegar was on sale at the farmer's market, and each one opened up a different version of the same recipe. Fresh herbs and citrus zest in the brine—think lemon thyme, rosemary sprigs, or strips of orange zest—create entirely new flavor stories.
Serving and Pairing Ideas
These pickles are gifts in a jar that keep giving. Serve them as an appetizer with crusty bread and good cured meats for an instant charcuterie moment. Pair them with soft vegan cheeses for a plant-based feast that feels substantial and considered. They're incredible alongside rich foods—think grilled fish or a heavy curry—where their bright acidity cuts through richness and refreshes your palate. A crisp Riesling or dry rosé is the perfect wine pairing, the kind of combination that makes you feel sophisticated even when you're eating straight from the jar in your kitchen.
- Try them alongside smoked salmon and cream cheese on dark bread for an elegant open-faced sandwich.
- Chop them finely and add to grain bowls or salads for unexpected pops of flavor and texture.
- Serve with a cheese board as your acidic counterpoint to rich, creamy flavors.
 Save
Save Making pickled and fermented vegetables is like learning a language that vegetables speak. Once you understand it, you'll never stop making them. Every jar is an experiment, every batch teaches you something new, and every time you set them on a board, you're sharing something that tastes like care.
Recipe FAQs
- → What vegetables work best for pickling and fermentation?
Crunchy vegetables like carrots, cucumbers, radishes, red cabbage, cauliflower, and green beans hold up well and provide vibrant colors and textures.
- → How long should the pickled vegetables sit before serving?
Quick pickled vegetables should rest refrigerated for at least 12 hours to develop flavor, while deeper taste comes from 24 to 48 hours.
- → What is the purpose of fermentation in this dish?
Fermentation not only enhances flavor complexity and tanginess but also introduces beneficial probiotics for digestive health.
- → Can I customize the spice blend used in the brine?
Absolutely. Ingredients like garlic, mustard seeds, coriander seeds, black peppercorns, bay leaves, dill, and chili can be adjusted to suit your flavor preferences.
- → How should the pickled and fermented vegetables be stored?
Store the jars sealed in the refrigerator to maintain freshness and limit spoilage; fermented varieties can be kept longer if properly cooled.
- → Are there any recommended pairings for this vegetable assortment?
This medley pairs wonderfully with crusty bread, cured meats, vegan cheeses, or a crisp Riesling or dry rosé wine.