 Save
Save I discovered these protein cheesecake cups on a Tuesday afternoon when I was staring at my gym bag and wondering why post-workout snacking always felt like choosing between guilt and boredom. The idea came together almost by accident: what if cheesecake could be both indulgent and actually good for you? The first batch turned out creamy, substantial, and somehow felt like I'd cracked a code. Now I make them in batches because they disappear faster than I expect, and everyone asks for the recipe thinking there's some secret I'm keeping.
My friend Sarah came over after a morning run, skeptical that anything healthy could taste this good, and then she had one straight from the fridge. She went silent for a moment, which is never a good sign, but then she laughed and said it tasted like cheesecake had a really fit cousin. That's when I knew I'd nailed it. Now whenever she visits, she expects them waiting in the fridge.
Ingredients
- Oat flour: The base player here, giving you structure and fiber without any grittiness if you pulse your oats finely enough.
- Almond butter or peanut butter: This binds everything together and adds richness that makes the crust feel intentional rather than obligatory.
- Honey or maple syrup: Just enough sweetness to make the base taste like something special, not just a health obligation.
- Salt: A pinch brightens everything and makes you wonder why more recipes whisper this secret.
- Reduced-fat cream cheese: Soften it at room temperature so it blends smoothly without lumps that'll haunt you.
- Greek yogurt: The protein boost that's sneaky because you barely notice it's there, just creamier.
- Vanilla whey protein powder: Two scoops gives you that post-workout benefit without making it taste medicinal.
- Vanilla extract: A teaspoon transforms the whole filling into something that tastes like it belongs in a nice restaurant.
- Lemon zest: Optional but genuinely worth the 30 seconds of zesting, adding brightness that balances richness.
Tired of Takeout? 🥡
Get 10 meals you can make faster than delivery arrives. Seriously.
One email. No spam. Unsubscribe anytime.
Instructions
- Make the crust:
- Combine your oat flour, almond butter, honey, and salt in a bowl until you get a crumbly texture that holds together when you squeeze it. The mixture should feel like damp sand, not wet dough.
- Press it into place:
- Divide the mixture among your six muffin liners and press down firmly with the back of a spoon until each base is compact and even. Don't be gentle here; you want a sturdy foundation.
- Prepare the filling:
- Beat the softened cream cheese until it's completely smooth, then fold in your Greek yogurt, protein powder, honey, vanilla extract, and lemon zest if using. Mix until you have one cohesive, creamy mixture with no streaks.
- Layer it up:
- Spoon the cheesecake mixture over each crust, smoothing the tops with a spatula. Fill them generously but not so much that they overflow when they settle.
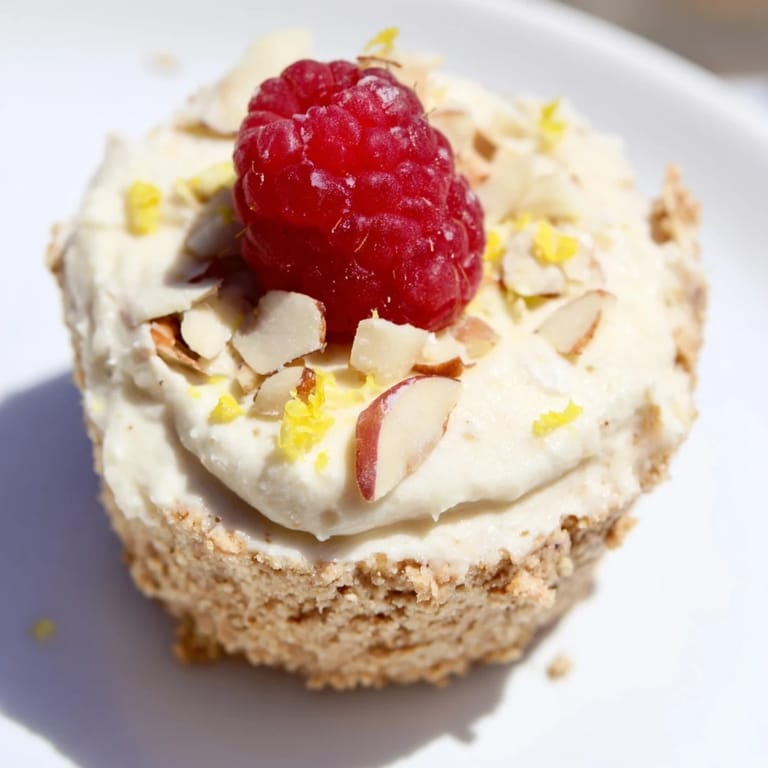
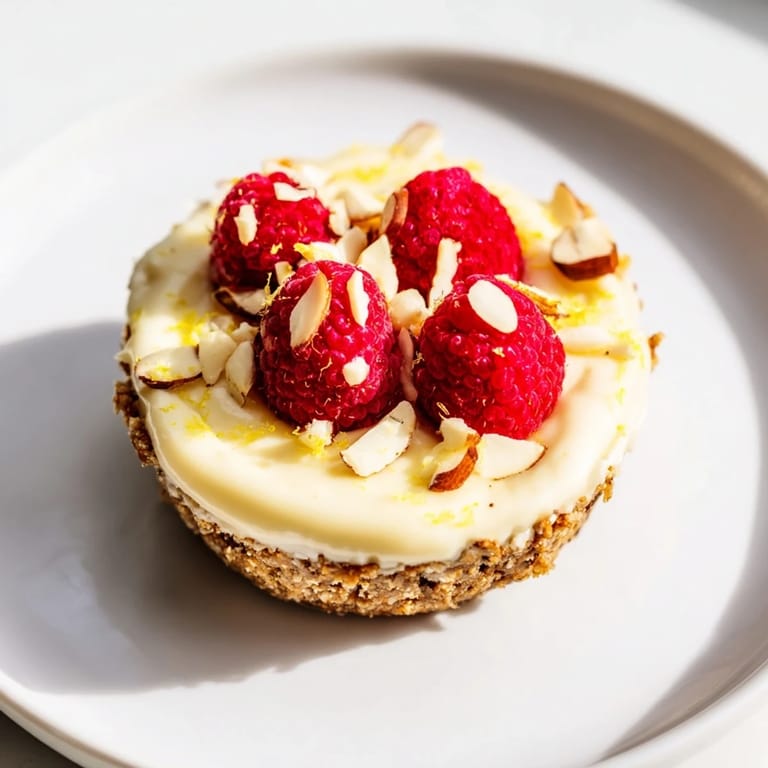
- Top and chill:
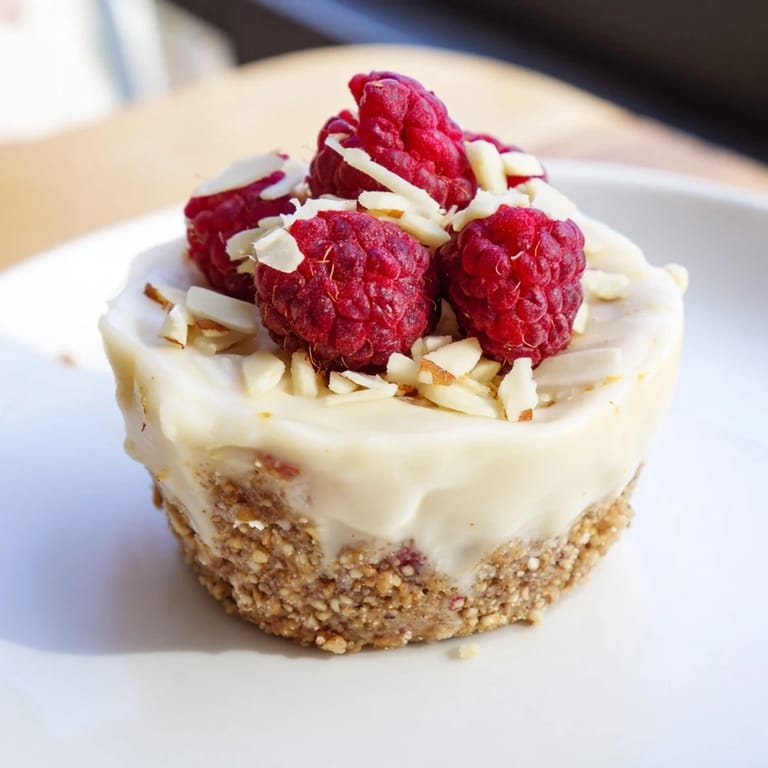
- Add your chosen toppings whether that's fresh berries, chopped nuts, or chocolate shavings, then refrigerate for at least two hours until everything is set and cold.
 Save
Save The moment these became more than just a recipe was when my 13-year-old nephew asked for a second one and actually thanked me instead of just grunting. He'd been convinced that anything healthy was automatically gross, and watching that assumption crack was worth every minute of prep work. Now he requests them more often than his mom asks me to babysit.
Flavor Combinations That Actually Work
Beyond the basic version, these cups are a canvas for experimentation that somehow always turns out. I've done dark chocolate shavings with raspberries, crushed salted pretzels with chocolate, and even a strawberry shortcake version by folding in freeze-dried strawberries into the filling. Each variation tastes intentional rather than random, probably because the base filling is rich enough to support additions without getting confused.
Why These Beat Store-Bought Protein Treats
Store-bought protein desserts often taste like they're trying too hard to be healthy, with artificial sweetness lingering after you've swallowed. These taste like actual cheesecake because the Greek yogurt and cream cheese do the heavy lifting. You control the sweetness, you know exactly what's in them, and they cost a fraction of what pre-made versions run.
Storage and Make-Ahead Magic
These keep beautifully in the fridge for up to five days, which means you can make a batch on Sunday and have grab-and-go protein snacks through the week. They also freeze reasonably well for up to a month if you wrap them individually. The texture changes slightly when frozen, becoming almost gelato-like, which is either a feature or a bug depending on what you're in the mood for.
- Always store them in an airtight container so they don't absorb fridge flavors and become mysteriously onion-scented.
- Remove them from the freezer 15 minutes before eating if you freeze them, just long enough to soften slightly without melting.
- Keep the muffin liners on until you're ready to eat unless you're serving them to guests.
 Save
Save These cheesecake cups prove that treating yourself and taking care of your fitness aren't opposing goals. They've become my answer to the constant question of what to bring to potlucks where everyone's pretending to watch what they eat.
Recipe FAQs
- → What can I use instead of oat flour for the base?
Almond flour works well as a gluten-free alternative, providing a similar texture and flavor.
- → How long should I chill the cups for best texture?
Chill the cups for at least 2 hours to allow the filling to set and develop a creamy, firm consistency.
- → Can I substitute the cream cheese with a plant-based option?
Yes, dairy-free cream cheese can be used for a vegan-friendly version without compromising texture.
- → What toppings complement the cheesecake cups best?
Fresh berries, chopped nuts, or dark chocolate shavings add flavor and texture for a tasty finish.
- → Is it necessary to use protein powder in the filling?
Protein powder boosts nutritional value and texture but can be omitted or replaced to suit preferences.