 Save
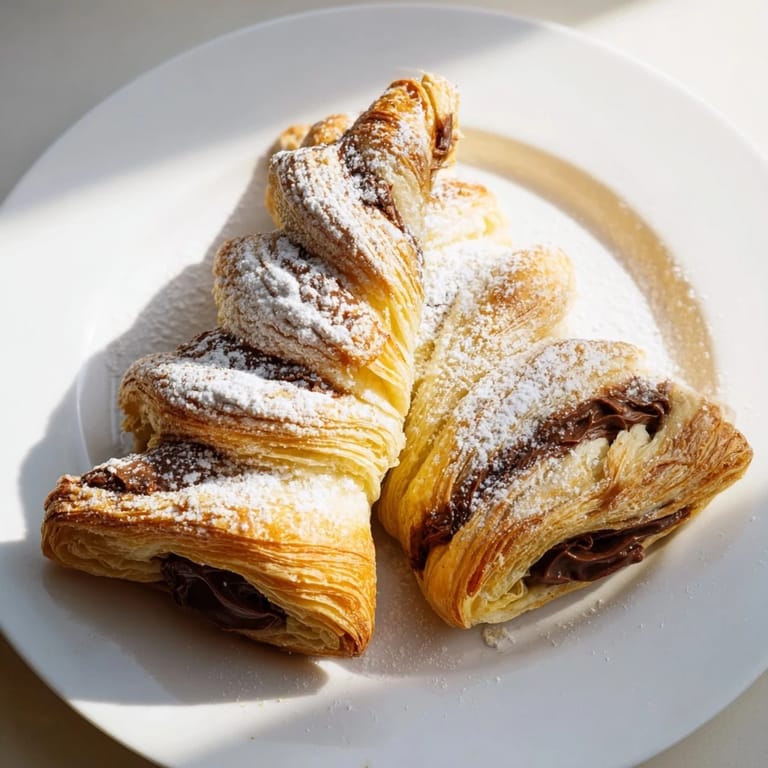
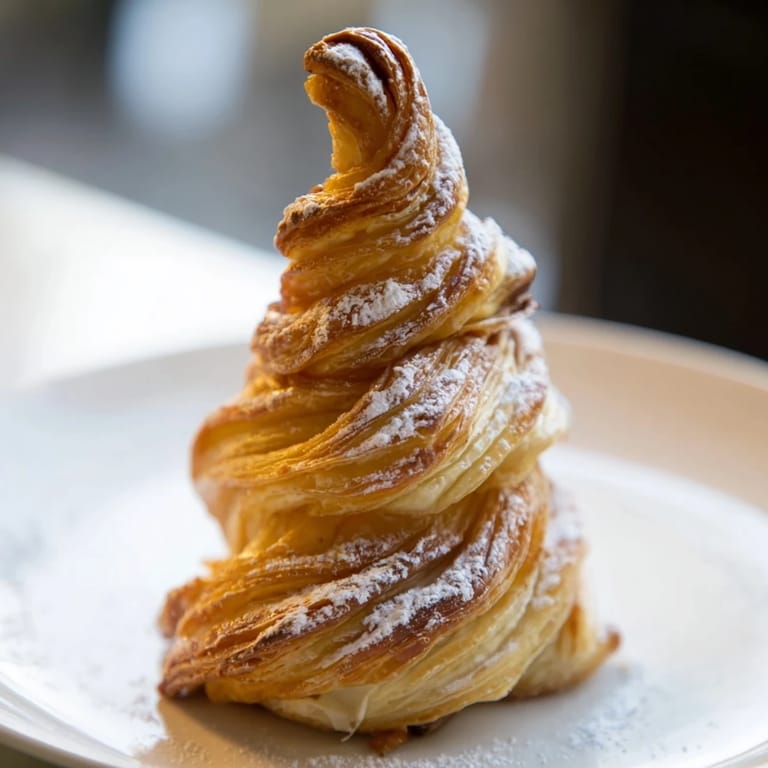
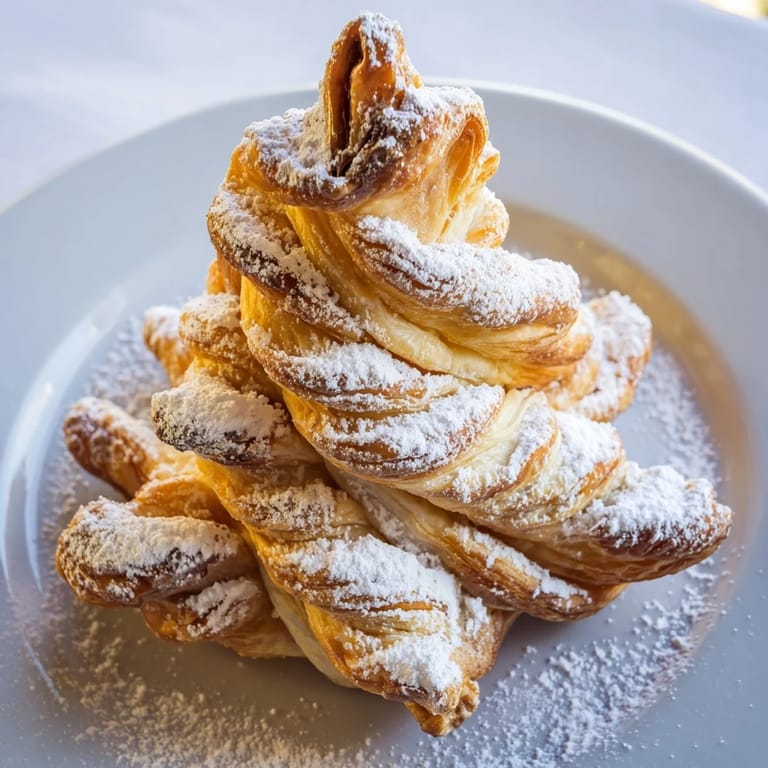
Save The first time I made these Nutella pastry trees, I was scrambling to put together something festive for a last-minute holiday potluck. I grabbed puff pastry from the freezer, a jar of Nutella from the pantry, and suddenly thought: what if I could make something that looked impressive but required almost no skill? Twenty minutes later, I had these golden, flaky trees coming out of the oven, and honestly, they stole the show. The combination of buttery pastry and that hazelnut chocolate filling is pure magic—crispy on the outside, a little gooey in the middle, and undeniably festive.
I remember my neighbor peering over the fence on Christmas Eve, drawn by the smell of caramelizing puff pastry and chocolate. She asked if I'd bought them from a bakery, and when I told her I'd made them in under an hour, she practically demanded the recipe on the spot. That's when I realized these trees had something special—they bridge that gap between homemade and fancy in a way that makes people feel genuinely impressed.
Ingredients
- Puff pastry (2 sheets, about 250 g each): The foundation of everything; make sure yours is thawed properly so it unfolds without cracking, and keep it cool before baking so it puffs dramatically in the oven.
- Nutella (120 g): The star filling that adds richness and that distinctive hazelnut-chocolate flavor—spreading it evenly matters because thin spots won't be as satisfying.
- Egg (1, beaten): Your egg wash, which gives these trees that glossy, golden-brown finish that makes them look bakery-quality.
- Powdered sugar (1 tbsp, optional): A final dusting that adds visual appeal and a touch of sweetness, like fresh snow on a evergreen.
Tired of Takeout? 🥡
Get 10 meals you can make faster than delivery arrives. Seriously.
One email. No spam. Unsubscribe anytime.
Instructions
- Prep and heat:
- Preheat your oven to 200°C (400°F) and line a baking tray with parchment paper so your pastries slide off without sticking. This setup takes two minutes and saves you from frustration later.
- Layer the magic:
- Unroll your thawed puff pastry sheets and spread Nutella evenly over one sheet, leaving about a 1-cm border so the layers seal properly when you stack them. Place the second sheet on top, pressing gently so the two sheets bond during baking.
- Cut into trees:
- Using a sharp knife or tree-shaped cookie cutter, cut out trees about 12-15 cm tall. If you have pastry scraps, re-roll them and cut more trees—this is also a nice moment to involve kids in the kitchen.
- Add character with branches:
- This is where they stop looking like flat pastry and start looking festive: carefully cut horizontal lines on each side of the tree trunk, then gently twist each branch outward. It takes maybe thirty seconds per tree and makes all the difference visually.
- Egg wash and bake:
- Brush each tree with beaten egg so they'll turn that gorgeous golden brown, then bake for 16-18 minutes until puffed and crispy. You'll know they're done when they smell incredible and look slightly darker at the edges.
- Finish and serve:
- Let them cool just enough to handle, dust with powdered sugar if you like, and serve warm or at room temperature. They're best eaten the same day, but you can reheat them in a low oven if needed.
 Save
Save My daughter brought these to her school bake sale, and they sold out in minutes—not because they're complicated, but because they're that rare thing: a dessert that tastes genuinely indulgent while feeling effortlessly homemade. That's the moment I understood these aren't just a holiday recipe; they're a conversation starter.
Why Puff Pastry is Your Secret Weapon
Puff pastry does the heavy lifting for you; those hundreds of delicate layers are what create that dramatic puff and the shattering crispness you bite into. The trick is respecting it—keep it cold, work quickly, and let the oven do its thing. Once you trust puff pastry, you realize you can layer it with almost anything, and it transforms basic ingredients into something that tastes like you spent hours in a French bakery.
The Nutella Question
Nutella is the obvious choice, but I've experimented with other chocolate-hazelnut spreads, and they all work beautifully. If you want extra texture, try stirring in a handful of finely chopped hazelnuts into your Nutella before spreading—it adds a subtle crunch that's unexpectedly sophisticated. Some people even swirl in a thin layer of salted caramel or a smidge of espresso powder for depth, though honestly, the simplicity is part of the charm.
Baking and Storage Tips
These trees taste best eaten the same day they're baked, while the pastry is still flaky and the Nutella has that perfect soft texture. If you need to prep ahead, you can assemble them completely and refrigerate for up to four hours before baking—this actually helps them puff even more dramatically. Leftovers (if there are any) reheat beautifully in a 160°C oven for about five minutes, though I've never had these stick around long enough to test that.
- A light dusting of powdered sugar right before serving makes them look extra festive and adds a hint of elegance.
- These pair beautifully with hot chocolate, coffee, or even mulled wine if you're serving them at a grown-up gathering.
- If you're making a big batch, set them out on a cooling rack so the steam escapes and they stay crispy on the bottom.
 Save
Save These little trees have become my go-to holiday offering because they hit that perfect sweet spot between impressive and achievable. They remind me that the best recipes are the ones that make people smile, and that doesn't always require complexity.
Recipe FAQs
- → What type of pastry is used for these treats?
Flaky puff pastry sheets provide the light and crisp base essential for this preparation.
- → Can the Nutella be substituted?
Yes, other chocolate-hazelnut spreads or similar creamy fillings can be used.
- → How are the tree shapes created?
By cutting the pastry into tree outlines, then twisting the branches gently for a decorative effect.
- → Is an egg wash necessary?
Brushing with beaten egg before baking helps achieve a golden, glossy finish.
- → What are good beverage pairings?
Warm drinks like hot chocolate or mulled wine complement these pastries nicely.